Boy, when I look back on my programmer career over the years, I find that the most troublesome thing is to build websites...
Let's show my current website: //www. cxyxiaowu.com
Then tell you how to build a cool and free personal blog from scratch.
GitHub Create Personal Warehouse
Log in to GitHub. If you don't have a GitHub account, please use your email to register a GitHub account: // github.com/join? source=header-home
After successful login, click New repository in GitHub to create a new warehouse. The warehouse name should be: user name // github.io 。 Here, the user name is replaced by your GitHub account name, which is a fixed expression.
Ps: Because I have already registered Warehouse with the same name , so an error will be reported during the second creation.
My warehouse name is:
Git management
Git is the most advanced distributed version control system (none) in the world. This is the purpose of using Git to submit our website locally to the server (GitHub). I think Git operation is a basic operation that programmers should have. You can see the details of Git operation Liao Xuefeng The tutorial is very detailed //www. liaoxuefeng.com/wiki/00 13739516305929606dd18361248578c67b8067c8c017b000
After installing Git, you only need to perform the following configuration.
configuration information
Operate on the terminal and set the user.name and user.email configuration information. I set it as global.
1git config -- global user.name "Your GitHub user name" 2git config -- global user. email "Your GitHub Registration Email "
Generate Key
Generate the ssh key file through the registered mailbox:
1ssh keygen - t rsa - C "Your GitHub registration email"
Then you can enter three numbers directly. By default, you do not need to set a password. Finally, we get two files: id_rsa and id_rsa.pub 。
Copy Key
Open the id_rsa.pub file and copy all the contents.
Paste to GitHub
Test GitHub SSH
After adding the SSH key, test it.
You will see:
1The authenticity of host github.com (207.97.227.239) cant be established.
2RSA key fingerprint is 16:27:ac:a5:76:28:2d:36:63:1b:56:4d:eb:df:a6:48.
3Are you sure you want to continue connecting (yes/no)?
Select yes
1Hi MisterBooo! Youve successfully authenticated, but GitHub does not provide shell access.
If you see your user name after Hi, it means success.
Install Node.js
Hexo is based on Node.js, so you need to install Node.js first. You can download the corresponding computer version here: // nodejs.org/en/download/
You can also install it from the command line:
cURL:
1$ curl //raw.github.com/creationix/nvm/ v0.33.11 /install.sh | sh two
Wget:
1$ wget -qO- //raw.github.com/creationix/nvm/v0.33.11/install.sh | sh
two
After installation, restart the terminal and execute the following commands to install Node.js.
1$ nvm install stable
Hexo installation
Hexo is a fast, concise and efficient blog framework. Hexo uses Markdown (or other rendering engines) to parse articles. In a few seconds, it can use beautiful themes to generate Static Web Page 。
After all the required applications are installed, you can use npm to install Hexo.
Hexo use
After installing the Hexo, it can be used immediately. First initialize the blog, enter:
1$ hexo init myBlog
Next, enter the folder myBlog and enter
1$ hexo s
Then, open the browser to enter the address:
1localhost:4000
In fact, the blog has already been set up after the implementation, and the next step is to improve it.
Note: The following commands operate in the myBlog file.
Add Article
1. Import articles directly
You can directly import the articles you usually write into the _posts folder. Note that the article type must be in md format.
2. Write a new article
You can execute the following command to create a new post.
1$ hexo new [layout] <title>
You can specify the layout of the article in the command. The default is post. You can specify the default layout by modifying the default_layout parameter in _config.yml.
A new article is also generated in the _posts folder.
Generate Web Page
Generating static files using Hexo is fast and simple.
1$ hexo generate
You can also abbreviate it as
1$ hexo g
Start Service Preview Article
Enter the following command to start the server, and your website will //localhost:4000 Start under. During server startup, Hexo will monitor file changes and automatically update them without restarting the server.
1$ hexo server
You can also abbreviate it as
If you want to change the port or encounter an EADDRINUSE error during execution, you can use the - p option to specify other ports during execution, as follows:
1$ hexo server -p 5000
Summary
1hexo new "My blog post" # Create a new post
1hexo generate # Generate web page
1Hexo server # Start service preview
The three commands are to create a new blog post, generate a web page, and preview locally.
deploy
Hexo provides a quick and convenient one click deployment function, which can deploy the website to the server with only one command.
You can also abbreviate it as
1$ hexo d
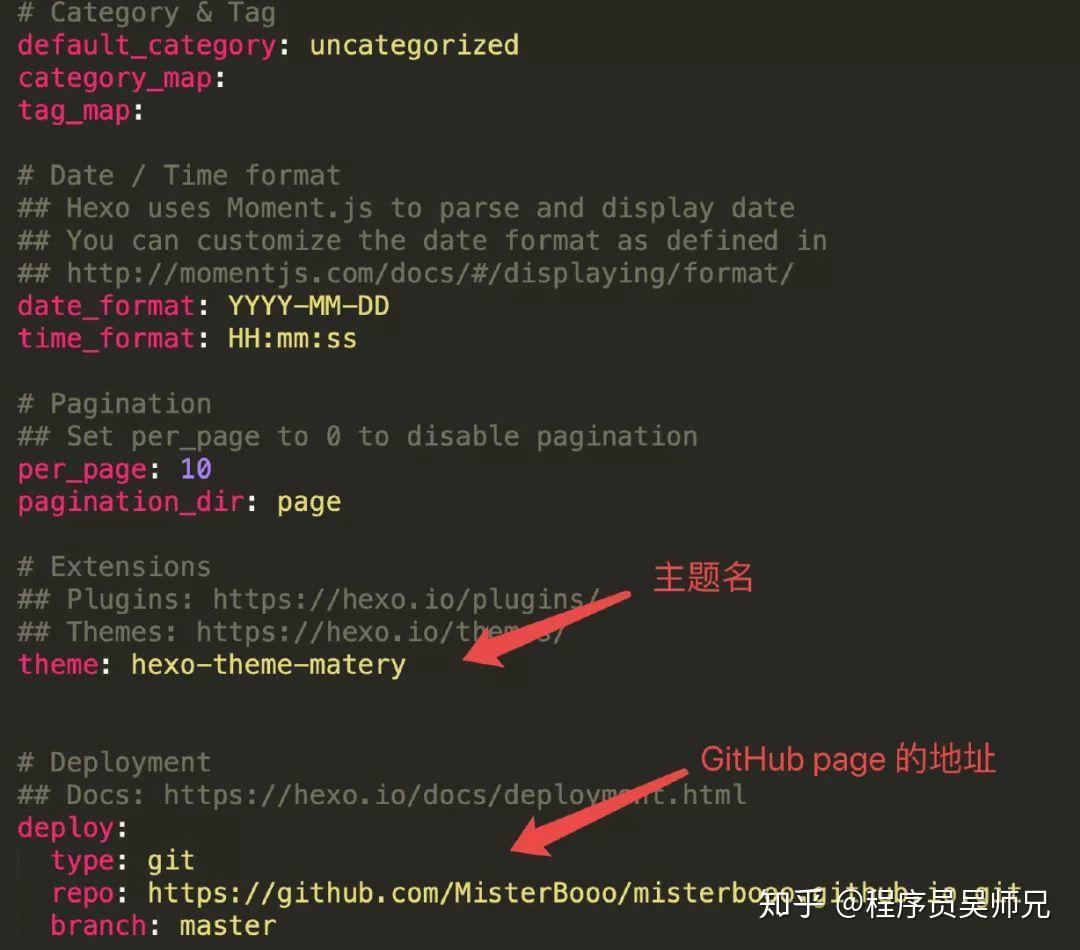
Before starting, you must modify the parameters in _config.yml. A correct deployment configuration must have at least the type parameter, such as:
1deploy:
2 type: git
Make changes in _config.yml.
The purpose of this step is to associate Hexo with GitHub.
Pass after configuration
1$ hexo d
Command, wait a moment, the website has been deployed, you can enter your GitHub name. github.io in the browser, so that a free blog has been built.
Hexo Theme
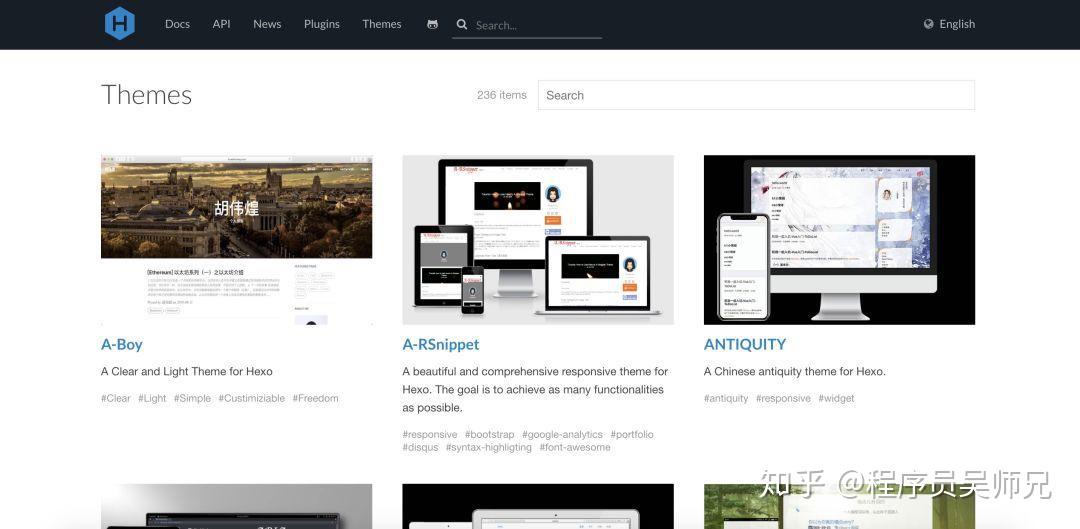
The default theme of hexo may seem a bit stiff. You can click // hexo.io/themes/index.ht ml Select and change the theme. Place the next theme in the themes folder, and modify the theme in _config.yml.
After an hour of theme screening, I chose the theme of hexo theme country. adopt // blinkfox.github.io/2018 /09/28/qian-duan/hexo-bo-ke-zhu-ti-zhi-hexo-theme-matery-de-jie-shao/ The documentation shows that after simple configuration, the effect will come out!
Generally, the theme provided by the big guys will provide a document description, and you can have a cool page by simply setting according to the description.
Markdown Writing
Markdown is a markup language that can be written using an ordinary text editor. Through simple markup syntax, it can make ordinary text content have a certain format.
There are numerous editors in the world that support Markdown syntax, which is very difficult to choose. Xiao Wu recommends Typora, a Markdown writing software.
Typora is a free MD editor, which is a perfect combination of elegance, simplicity, power and openness.
Direct access to official website // typora.io
Image
One of the main reasons for choosing Typora is its good support for pictures.
After the iPic is installed on the Mac, and the picture insertion is modified to upload through iPic in the settings, the shortcut key is control+command+i, and the picture insertion can be completed quickly and elegantly. One point to emphasize: the default Weibo totem bed is enough for the totem bed, and it is recommended not to toss and turn.
In this way, every time you write, drag the picture into Typora, and the picture will be automatically uploaded to the drawing bed.
summary
Apply for a GitHub account, create a warehouse on GitHub, equip Git, and submit the SSH key to GitHub for installation Node.js Installing Hexo Installing Hexo Theme Writing Articles Using Markdown Software
I hope this article can help those who want to write a blog but haven't yet put it into practice. After all, it's easy and fun to have a free and cool blog:)
Welcome to show your website in the comments area.


