This article is suitable for Xiaobai, which takes you step by step to build your first website on ECS through WordPress!
The following four things need to be done to launch a website. This article will focus on the third part, how to deploy a website server
1、 Basic concepts
1. A website deployment requires four environments: operating system environment, web service environment, database environment, and web page development language environment. That is to say, these programs need to be prepared, installed and debugged when building the station
2. LAMP: This is the abbreviation of four environments. L is Linux, A is Apache, M is MySQL, and P is PHP; There is also LNMP, where N is Nginx
3. The domain name is the web address, but the composition of the domain name is hierarchical, such as //www. ucloud.cn
4. If you want to visit a domain name, you need to make a one-to-one correspondence between the domain name and the corresponding ECS public IP address, and announce it on the DNS server. This action is actually a process of filing in China. Your domain name will be resolved by DNS only if the country recognizes your website. The domain name of. com does not need to be filed abroad, so many people choose to build a website in Hong Kong.
2、 Deployment process
1. To purchase an ECS, select a Linux system, and obtain an EIP, you need to apply for a UCloud account in advance
2. Install the Apache service so that the server can respond to web requests and display the website externally
3. Install MySQL database and establish database and table for website
4. Install the PHP environment so that Apache can interpret PHP web pages
5. Install Wordpress and configure basic information
6. Successfully configured to access the website
Part 0: Create virtual machine UHost for this experiment
0. Log in to the UCloud console
visit // console.ucloud.cn And log in with your account and password.
If the account is not authenticated by real name, please complete the real name authentication process first.
1. On the console page, switch the project to the previously created "Uchuangying", and click "All Products" in the upper left corner of the page and click "Virtual Machine UHost" to enter the virtual machine UHost management page.
2. Click "Create Virtual Machine"
3. Select "Beijing II" region and "Zone B", and select "CentOS 6.6 version" for the image. Be sure to select the correct operating system version number, otherwise the following operations may report errors,
4. Select Firewall UFirewall as "Web Application Recommendation", fill in the password, such as UCloud UHost, and use the default value for others.
5. Select "Charge by Hour" on the right side of the page and click Purchase.
Part 1: Remote access to virtual machine through SSH tool
6. View the virtual machine IP address.
Please create a virtual machine in zone B of Beijing II and bind the EIP. After creation, you can view the EIP bound to the virtual machine on the console.
7. Download PuTTY/XShell and other tools.
You can directly search for "PuTTY" in the search engine and download it.
8. Fill in the EIP address, user name (CentOS defaults to root) and password on the virtual machine to connect.
9. Log in with an account and password. The default account is root; The password is the password filled in when creating the virtual machine.
10. Run the command to view the file after login.
cd /
ls -alh
11. Execute the command ping the UCloud official website.
ping www.ucloud.cn
Part 2: Install httpd, PHP, MySQL and other components on the virtual machine
12. On the command line, execute the following command to install httpd
yum install httpd -y
13. Install PHP
yum install php -y
14. Install MySQL
Note: Please copy each command line to the command line for execution.
yum install mysql-server -y
yum install php-mysql
15. Start Service
service httpd start
service mysqld start
16. Access the default page of httpd through the IP address.
Part 3: Installing WordPress
17. Download the source code of WordPress software.
cd /var/www/html
wget // ucy.cn-bj.ufileos.com/w ordpress-5.1.3-zh_CN.zip
18. Extract the WordPress source code.
Install the unzip tool first.
yum install unzip -y
Extract the WordPress source code. Be sure to decompress in the/var/www/html directory, because the default website path configured by httpd is in this folder
unzip wordpress-5.1.3-zh_CN.zip
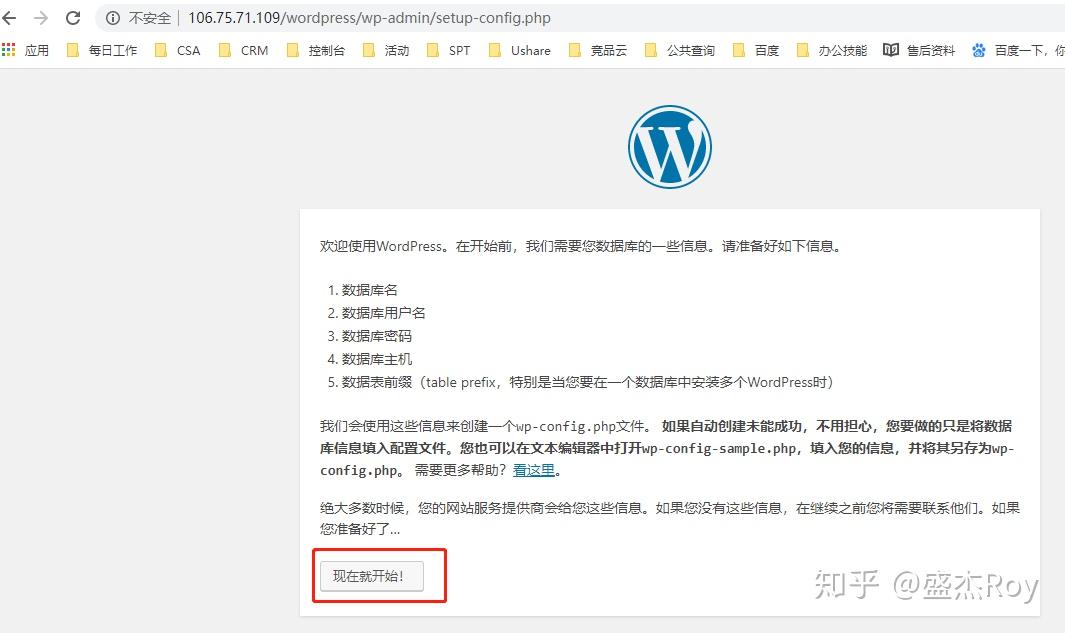
19. Access the EIP address "/wordpress" bound on the virtual machine in the browser to install WordPress, for example:
106.75.71.109/wordpress/
Do not click "Start now!" This means that the initial file of Wordpress has been successfully installed and the httpd service has been started. You need to configure the database before you can start configuring Wordpress
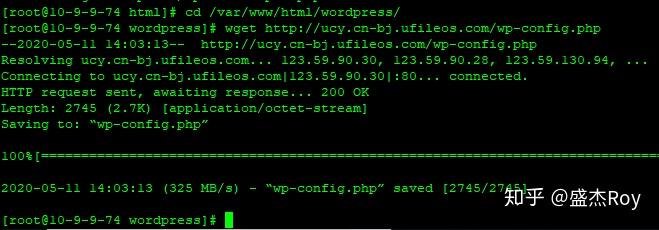
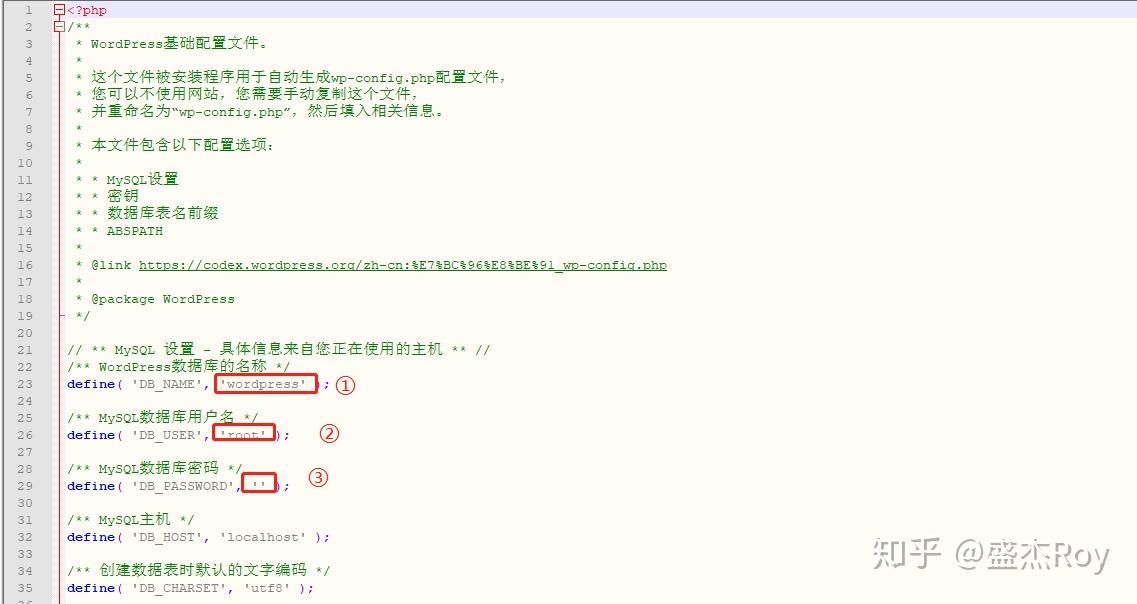
20. Download the modified wp-config.php file through the following command. The database name, login user name and password have been modified in the file. The wp-config.php file is a configuration page used by Wordpress to configure the database, user name, and password. This is to avoid complicated operations such as modifying configuration commands, and directly provide a simplest version of the configuration file. You can change the user name and password of wordpress and other information here by yourself, as long as they are consistent with the ones you created. For example, the root password, database password, etc. are all modified here. The modification method is vi wp-config.php (you can use the vi or vim command under Baidu Linux)
cd /var/www/html/wordpress/
wget // ucy.cn-bj.ufileos.com/w p-config.php
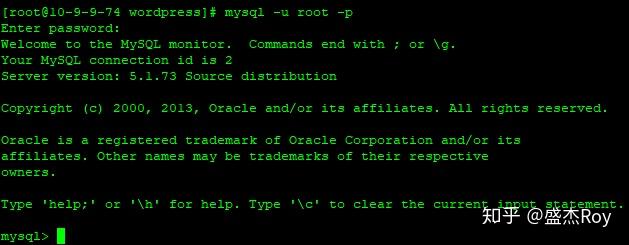
21. Create a database on the command line.
mysql -u root -p
Enter Enter directly at the prompt for password, that is, no password is required, and the default password is blank.
CREATE DATABASE wordpress; # The database name here must be consistent with that in the wp-config.php file above
exit
22. The classic installation process of WordPress is to access the EIP address "/wordpress" bound on the virtual machine in the browser, as shown in the following example:
1.1.1.1/wordpress
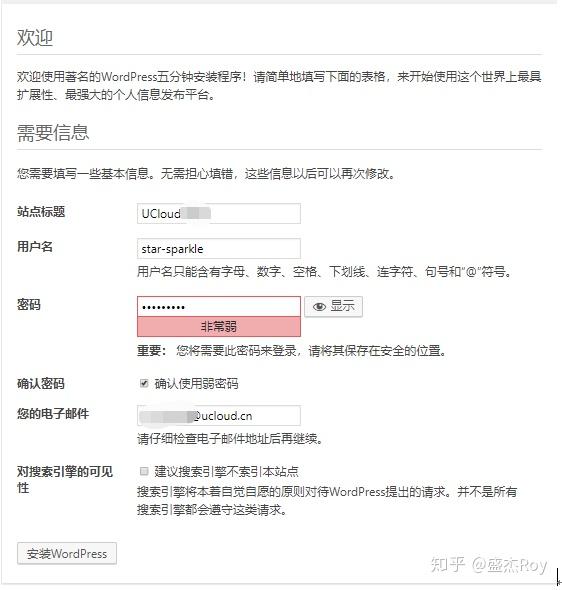
Now start configuring Wordpress and click "Start now!"
Click "Install Now", do not delete
Part 4: Publish the first page
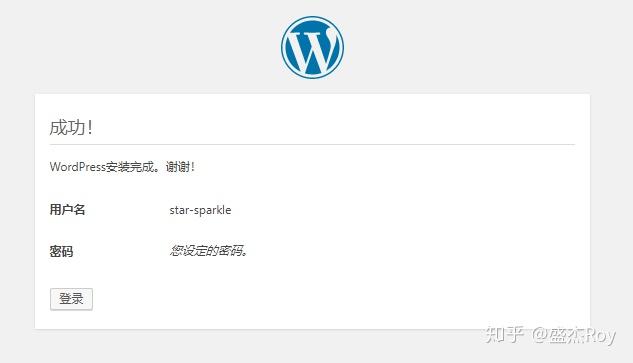
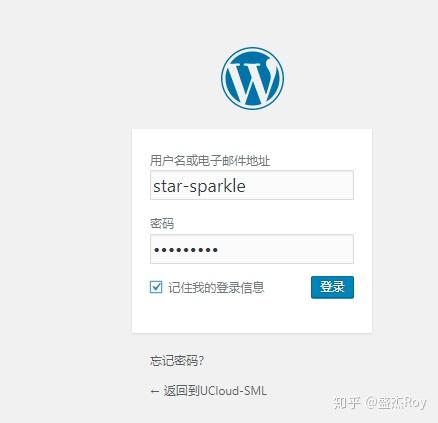
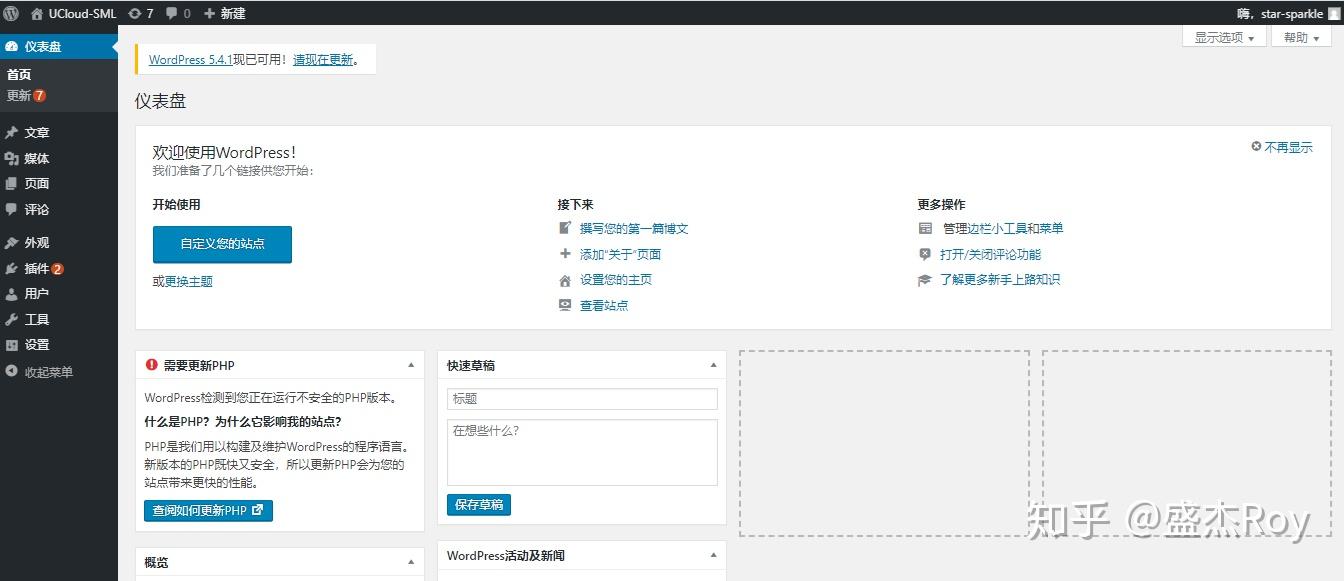
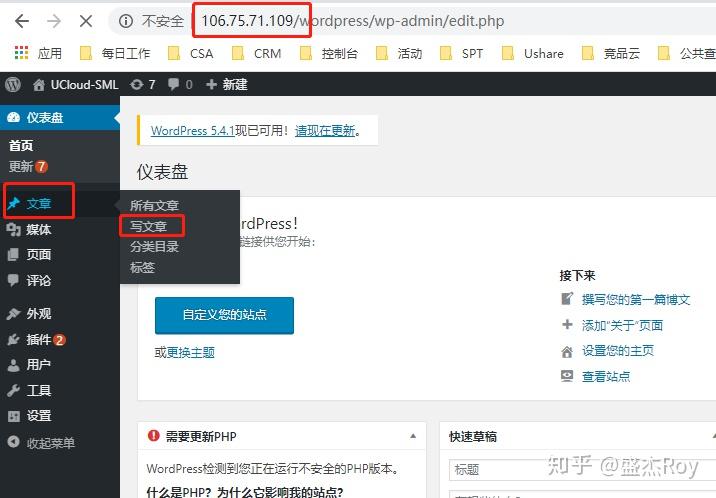
22. Log in to the WordPress background.
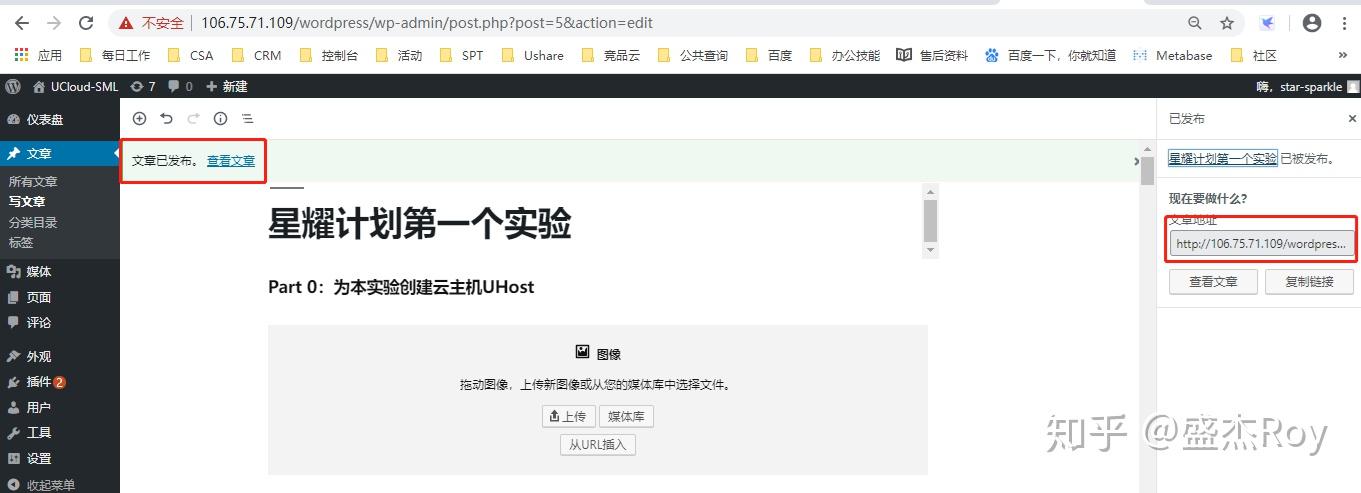
23. Publish the first article.
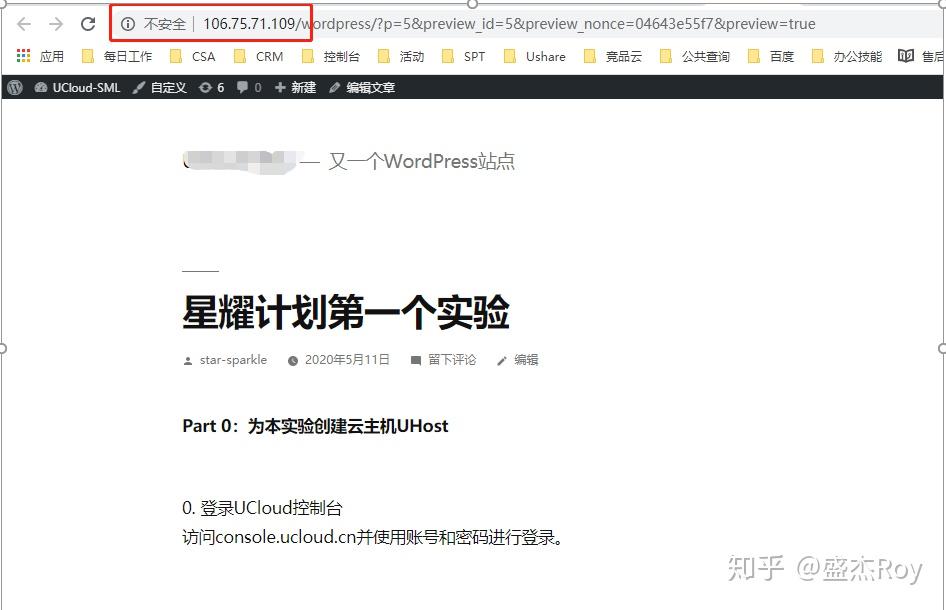
24. After publishing the completed post, click "View Post" to access the first blog post. It can also be sent to other partners to visit.
So far, congratulations! Your first website has been successfully created. If you do a good job of filing the server, you can access it through the domain name!
Pit stepping reminder:
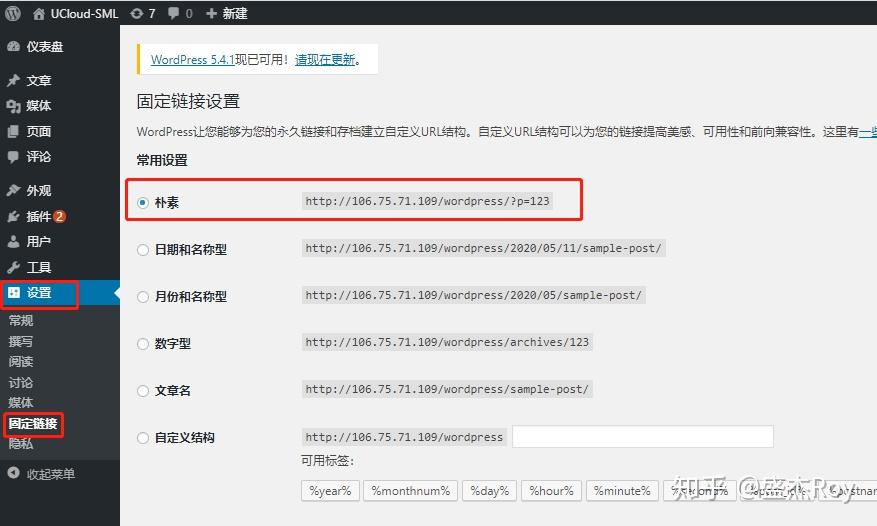
If the prompt "Awkward! This page cannot be displayed" is a fixed connection problem, you need to change it to "plain" in "Settings" - "Fixed Connection" - "
Author:
Roy UCloud solution architect


